# Assignment 3: Fancy Twos
v1.01:
- minor edits
## Goals
Learn to use:
* property animation
* custom views
* drawing
* gestures
* tab bars
* user defaults
* dynamic animations
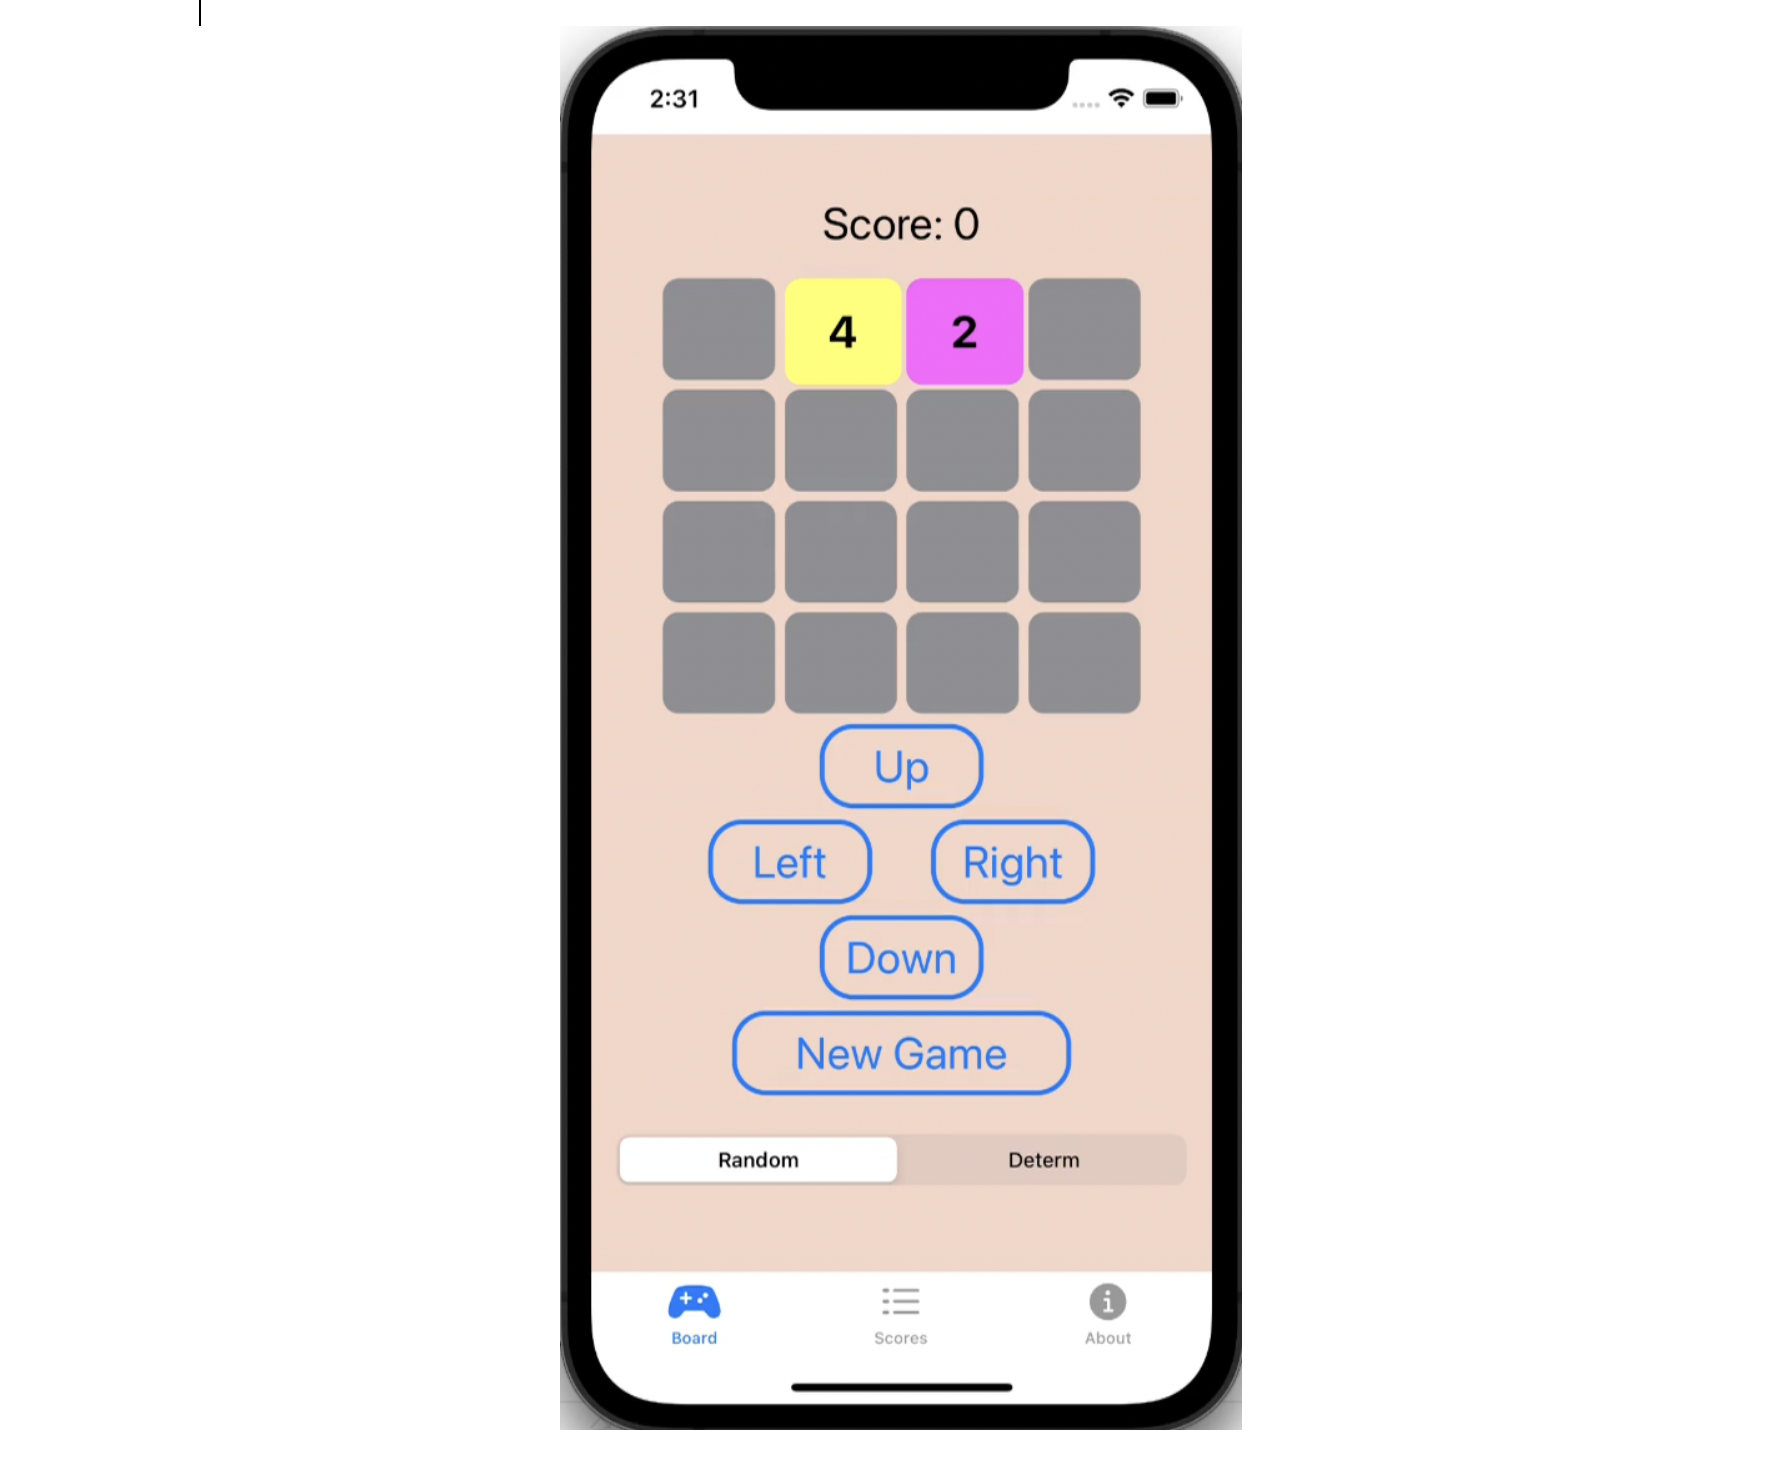
This is the project where we end up with a real SwiftUI game we can give out
to friends and family. We are not significantly changing core
functionality, but we are adding many of the extras that make apps usable.
See the demo video on ELMS.
## Before you begin
This project is based on the last one, but copying Xcode projects is a
dicy, multiple-step project, easy to mess up.
Instead, I suggest you create a new project `assign3` in your repository,
no need for any tests. Create new files with the same name in your last project ("model.swift" and any other files you created), and copy paste the files to this new project.
Run this version to ensure everything is working correctly, quit out of Xcode,
`git add` your code, and then commit push to the server. Note that if you
create more files, you need to manually add them as well. `git status` will
tell you what has been modified or is new.
We realize that `git` is sometimes a challenging, non-intuitive tool,
especially as we are not using Xcode's GUI interface, but understanding git
will serve you well in almost any facet of the tech world going forward.
## Task 1: Ensure Model is using Tile
Your model is conceptually unchanged. However, the view is now going to animate with tile movement, therefore needs to recognize specific tiles in order to identify tile movements.
Your data model should be based on *Tiles*, with a structure like this:
```
struct Tile {
var val : Int
var id : Int
var lastRow: Int // recommended
var lastCol: Int // recommended
}
```
`val` represents the value to be shown on the board, `id` is an unique id for this tile. You may also include `lastRow` and `lastCol` to represent the location of this Tile on the board (They could help you determine the frame of tiles in the view), and also include any other variables as you need. Then, the `board` in your model will change from [[Int]] to [[Tile?]]. With this change, you can explicitly manipulate each tile on the board by working on its corresponding "Tile" data structure.
Suppose we have a row of tiles as:
```
(val: 2, id: 13), (val:2, id:14), nil, nil
```
If we are collapsing left, we want Tile `id = 13` to disapper, while moving `id = 14` to its left, and change its value to 4. This will make the animation the view animation more straightforward and fluid. You might need to modify your model's shift() function to handle this task.
## Task 2: TileViews
Your approach should be based custom views, called *TileViews*,
that include the Tile structures you made previously. You might define
the new views as follows:
```
struct TileView: View {
var tile = Tile(val: 0, id: 0, lastRow: 0, lastCol: 0)
...
init(tile: Tile) {
self.tile = tile
...
}
var body: some View {
Text(tile.val.description)
...
}
}
```
You can create a method `func getFrame(t: TileView) -> CGRect` to
calculate the frame of each `TileView`, and use `Offset` to change the
location of each tile shown on the screen. Your code should be able to
perform as last assignment since each `TileView` has its unique id,
value and frame on the screen.
You can make a list of `TileView`, and load the `TileView` with
`ForEach` when the view gets updated. Each time a new tile is added to
the list, or an old tile is removed from the list, or tile in the list
changes, the view should get updated.
You may revise the spawn() method in Model or related method in View
so that each time a new tile is spawned, its corresponding Tileview
will be added to the list.
## Task 3: Animation
You need to implement "tile moving animation" to show the movements of tiles while clicking the direction buttons.
Hint: You can implement the animation of tile movement by adding
animation keywords at 2 locations of your implementation. You may also
need to use .offset with variables to determine the start and end
location of each tile. Example:
1. tileView:
```
ForEach (0..<tiles.count, id: \.self) { i in
tileView[i].offset(x: x[i], y: y[i])
.animation(.easeInOut(duration: 1))
```
2. Button:
```
Button (action: withAnimation
{movingUp}) {
Text("Up")
}
```
There are plenty of ways to make animations in SwiftUI, you do not
have to implement the same way as we did here. We will not inspect
your code for this project, but only check your View.
## Task 4: End of Game
In the last project, we never handled a situation when our game failed
or ended. We should implement a Boolean variable `isDone` in
model.swift, and a method `func isGameDone()` to check if the game is
ended.
When will the game end?
1. When there is no any empty tile or possible moves of the tiles in
the board. You should handle the situation where some of the
directions are not executable where some other directions are
executable. In this situation, clicking the un-executable direction
button will do nothing. Only when ALL 4 directions are not executable,
the game is ended.
2. When we click the `New Game` button. Every time we click the `New
Game` button, the current game will end.
What will happen after the game ends?
A window should pop up to show the final score of current play. You
can use `ZStack` to implement this view. By clicking the "Close"
button should start a new game. Every time a game ends, the score
should be recorded, this will be discussed in later task.
## Task 5: Gestures
Add up, down, left, and right drag gestures to the board. Each
direction gesture should work exactly the same as cliking the
direction buttom. The gesture can be attached to your game board by
adding `.gesture(DragGesture ...)` at the end of your board view.
## Task 6: TabView
You should create a `TabView` in your ContentView.swift with three subviews. The first should be your board
view, the second the high scores, and the third is your "About" screen.
## Task 7: Implement the *HighScores* Page
### For the Score Model:
1. Create a new data structure *Score* to record each game's result. You may want to add more variables and methods as needed. `Hashable` is not necessary but makes it much easier to sort the list. The following is an example of this data structure:
```
struct Score: Hashable {
var score: Int
var time: Date
func hash(into hasher: inout Hasher) {
hasher.combine(time)
}
init(score: Int, time: Date) {
self.score = score
self.time = time
}
}
```
2. Create a high scores list. Add two initial entries (score = 300 and 400, while date
time can be any time) to this list when the app gets
initiated. This means that we should see two results in the
score page even if we never played a game.
3. Sort the list. You can perform the sorting when the score page appears, or when new data points are added.
### For The Score View:
- Create a new file called "Scores.swift", and create a view called `ScoresView`.
- Use a List to show high scores. Include the rank, the score, and the datetime of each data point.
**Important:** The scores must be sorted. The datetime can be any format, but should include both the time and the date.
## Task 8: Implement the *About* Page
It doesn't have to be like mine, and it doesn't have to use gestures, but it
should be fancy. Use `Path.addCurve()` or `CGPath` to draw something a diagram, make a little
mini-game or animation, be creative!
## Task 9: Portrait vs. Landscape
So far we have assumed portrait orientation. Your game should work in landscape as well.
You can create variables:
```
@Environment(\.verticalSizeClass) var verticalSizeClass
@Environment(\.horizontalSizeClass) var horizontalSizeClass
```
to check the current orientation of the screen and modify the View
accordingly. We will test your work by rotating the screen; we
should see the position of game board and buttons rearrange
at each orientation change.
## Grading
The task enumeration above is to aid you in planning your work. The grading scheme below is a bit different:
- 30: Animation of tile movement
- 20: End of game logics
- 10: Gestures
- 10: TabView with navigations
- 10: High Scores Page
- 10: About Page with animation.
- 10: Orientations of Screen
[](assign3video.mp4)